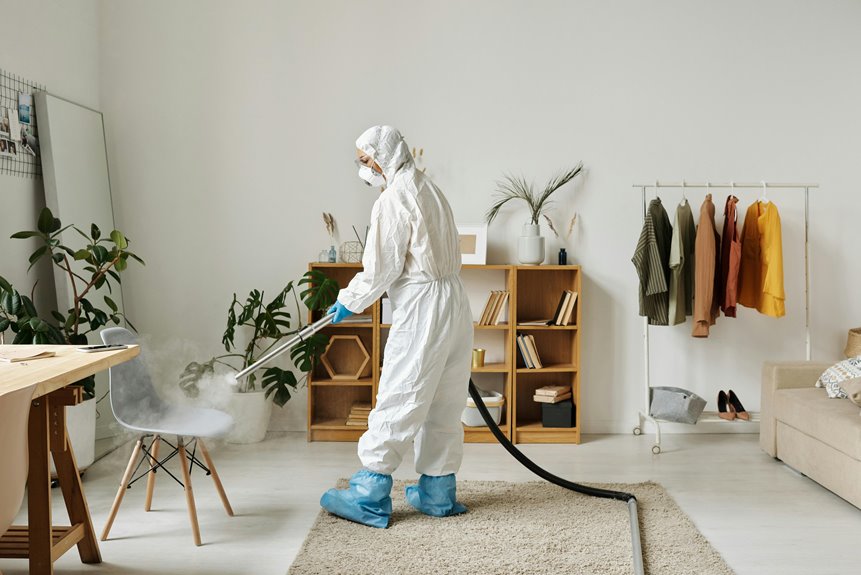
I’ve discovered that most homeowners don’t realize steam cleaning can effectively refresh painted walls without causing damage – when done correctly. As someone who’s tested various wall-cleaning methods, I can tell you that steam’s gentle yet powerful approach removes stubborn grime, grease, and even nicotine stains that regular washing can’t touch. Before you grab that steamer, though, you’ll need to know which paints can handle the heat and which cleaning techniques will protect your walls.
Understanding Different Paint Types and Their Steam Resistance

Before you begin steam cleaning your walls, it’s crucial to identify the type of paint you’re working with since different finishes respond differently to steam exposure.
I’ve found that glossy and semi-gloss paints typically offer the best paint durability against steam, making them ideal for kitchens and bathrooms where moisture is common.
Flat or matte finishes, which I often see in living rooms and bedrooms, are more susceptible to damage from steam exposure.
If you’re dealing with latex paint, I recommend testing a small, inconspicuous area first, as it can bubble or peel under high heat.
Oil-based paints generally withstand steam better, but I still suggest using caution and maintaining a safe distance between the steamer and wall surface.
Essential Tools and Equipment for Safe Steam Cleaning
Now that you understand how different paints react to steam, let’s look at the right tools for the job.
I always recommend starting with a handheld steam cleaner for walls, as larger commercial steam cleaner types can be too powerful for home use.
You’ll need several essential items for proper wall protection: microfiber cloths to catch drips, painter’s tape to protect trim, and a moisture meter to monitor wall dampness.
I’ve found that attachments matter too – look for a steam cleaner with both wide-head and detail nozzles, plus soft-bristled brushes that won’t scratch your paint.
Don’t forget your safety gear: I always wear heat-resistant gloves, protective eyewear, and non-slip shoes when steam cleaning walls, since you’ll be working with hot water and reaching overhead.
Pre-Cleaning Assessment and Surface Preparation
Since steam cleaning can potentially damage certain wall surfaces, conducting a thorough pre-cleaning assessment is essential for successful results.
I always start by examining the paint condition, looking for any peeling, bubbling, or previous repairs that might become problematic during cleaning.
Before I begin, I test the wall texture in an inconspicuous spot to verify it can withstand the steam’s heat and moisture.
I’ll gently run my hand across different sections to check for inconsistencies, cracks, or loose areas. If I find any concerning spots, I mark them with painter’s tape for extra caution.
You’ll want to remove all wall decorations, pull furniture away from the walls, and cover your baseboards with towels to protect them from drips.
Proper Steam Cleaning Techniques for Painted Walls

When steam cleaning painted walls, I maintain ideal distance of 6-8 inches between the steamer head and the surface, working in manageable 3-foot sections from top to bottom. I’ve found these steam cleaning techniques essential for wall damage prevention, and I’ll walk you through my process.
| Step | Action | Safety Note |
|---|---|---|
| 1 | Test small area | Check paint adhesion |
| 2 | Set steam level | Medium-low for latex |
| 3 | Keep moving | Prevent water pooling |
| 4 | Wipe excess | Use microfiber cloth |
| 5 | Allow drying | Promote ventilation |
I always use gentle, sweeping motions and never let the steamer linger in one spot. After cleaning each section, I immediately wipe away any excess moisture with a clean microfiber cloth. Remember, you’ll want good ventilation throughout the process to prevent moisture buildup.
Common Mistakes to Avoid When Steam Cleaning Walls
Even the best steam cleaning techniques can go wrong without proper awareness of common pitfalls. When I’m working with homeowners, I notice several cleaning mistakes that can damage painted walls, including holding the steamer too close to the surface and staying in one spot too long.
I want you to avoid these damaging practices: using excessive pressure when steaming, failing to test an inconspicuous area first, and neglecting to check your wall’s paint type.
Don’t make the mistake of steaming near electrical outlets or light switches, and never clean fresh paint that hasn’t fully cured.
I’ve also seen people skip the vital step of wiping down walls before steaming, which can grind dirt into the paint, and ignore signs of paint lifting or bubbling during the process.
Alternative Cleaning Methods for Delicate Paint Finishes
Although steam cleaning works for many surfaces, delicate paint finishes require gentler alternatives that won’t risk damaging your walls’ beautiful appearance. For paint preservation on delicate surfaces, I recommend these proven methods that I’ve tested extensively in my own home.
| Method | Best For | Tools Needed |
|---|---|---|
| Microfiber Wash | Light Dirt | Damp Cloth, Mild Soap |
| Dry Dusting | Daily Maintenance | Extendable Duster |
| Spot Cleaning | Stains | White Vinegar Solution |
I’ve found that using a mixture of warm water and mild dish soap with a soft microfiber cloth works wonders for most situations. Always test your cleaning solution in an inconspicuous area first, and remember to work from bottom to top to prevent drip marks. Don’t forget to dry the walls immediately with a clean, lint-free cloth.
Post-Cleaning Care and Maintenance Tips

Proper care after cleaning your painted walls helps maintain their fresh appearance and extends the time between deep cleanings.
I always recommend conducting a thorough post-cleaning inspection to check for any issues that need addressing before they become bigger problems.
Here’s my proven maintenance routine to keep your walls looking their best:
- Check walls weekly for new scuffs or marks, wiping them away promptly with a slightly damp microfiber cloth.
- Dust walls monthly using a soft brush attachment on your vacuum or an extendable duster, paying special attention to corners and baseboards.
- Monitor humidity levels in your home to prevent moisture damage, keeping levels between 30-50% with proper ventilation and dehumidifiers when needed.
When to Call a Professional Wall Cleaning Service
While many wall cleaning tasks can be handled as DIY projects, certain situations call for bringing in professional expertise and specialized equipment.
I recommend seeking professional services when you’re dealing with smoke damage, extensive mold growth, or stubborn stains that won’t budge with regular cleaning methods.
If your walls are particularly old, delicate, or feature expensive finishes, I’d suggest letting experts handle the cleaning to prevent accidental damage.
You’ll also want to contact professionals when working with high ceilings, hard-to-reach areas, or when proper wall maintenance requires industrial-grade equipment you don’t have access to.
Watch for signs like peeling paint, water damage, or if you’re unsure about your wall’s paint type – these are clear indicators that it’s time to call in the pros.


