Just like Rome wasn’t built in a day, a well-designed DIY hay feeder can take some careful planning but will save you money and hassle in the long run. I’ve built several hay feeders over the years, and I’ll share my proven methods for creating a durable, waste-reducing system that keeps your horses happy and your hay off the ground. From selecting weather-resistant materials to incorporating smart design features that prevent spoilage, you’ll discover how to construct the perfect feeding solution for your equine companions.
Materials and Tools You’ll Need

Before you start building your DIY hay feeder, I’ll help you gather all the essential materials and tools you’ll need for this weekend project.
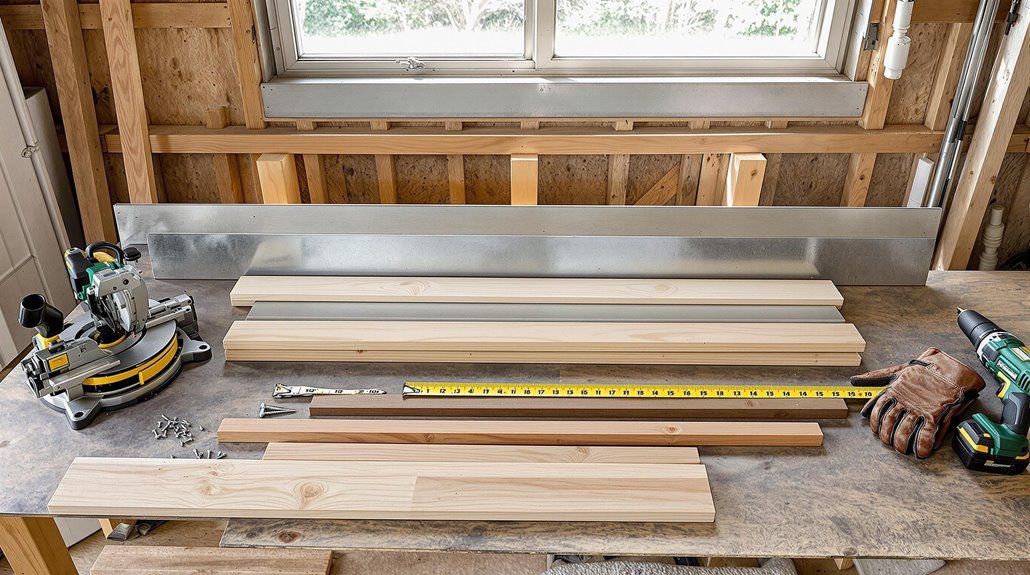
You’ll want pressure-treated lumber for the frame, including 4×4 posts for the corners and 2x4s for support beams. For the best weather resistance, I recommend cedar or cypress wood types when selecting your boards.
For tools, you’ll need a circular saw, drill with various bits, measuring tape, level, post-hole digger, and heavy-duty screws.
I’ve found that planning your feeder dimensions beforehand helps determine exact material quantities – typically, a 4×6 foot base works well for two horses.
Don’t forget safety gear: work gloves, safety glasses, and a dust mask for when you’re cutting wood.
Planning Your Hay Feeder Design
When designing your hay feeder, you’ll want to carefully consider key factors like the number of horses, available space, and feeding height preferences. I recommend sketching out your design preferences before gathering materials, making sure you’ve accounted for your horses’ unique feeding styles and safety requirements.
- Choose a design that prevents hay waste by incorporating a catch tray or slanted bottom, which I’ve found can save up to 30% of your hay costs.
- Plan for adequate spacing between feeding stations, allowing at least 4 feet per horse to reduce conflict and guarantee comfortable access.
- Include protective edges and rounded corners in your design to prevent injuries, while maintaining easy access for daily cleaning and hay refills.
Remember to position your feeder in a well-drained area that’s protected from harsh weather conditions.
Safety Considerations for Horse Feeders
Since horse safety is my top priority when building a DIY feeder, I’d like to share essential safety features that’ll protect your horses during feeding time.
I always confirm there aren’t any sharp edges, protruding nails, or rough surfaces that could harm your horses while they’re eating.
When it comes to preventing injuries, I recommend rounding all corners and using smooth, weather-resistant materials that won’t splinter or deteriorate.
Feeder stability is vital, so I secure the structure firmly to the ground or wall, preventing it from tipping over during use.
I also make certain the feeding height is appropriate, keeping it at chest level to maintain natural grazing positions.
You’ll want to include spacers between feeding slots to prevent fighting and guarantee each horse has enough room to eat comfortably.
Step-by-Step Construction Guide

Building a safe hay feeder starts with gathering the right materials and tools for the project.
I’ll guide you through creating a feeder that matches your horse’s feeding habits while keeping safety as our top priority. When I build hay feeders, I always consider the different types and choose designs that prevent waste.
- Start by measuring and cutting your treated lumber to size – you’ll need four 4×4 posts at 6 feet each for the corners, and six 2×6 boards at 4 feet each for the sides.
- Install heavy-duty mesh wire on three sides of the frame, leaving one side open for easy hay loading.
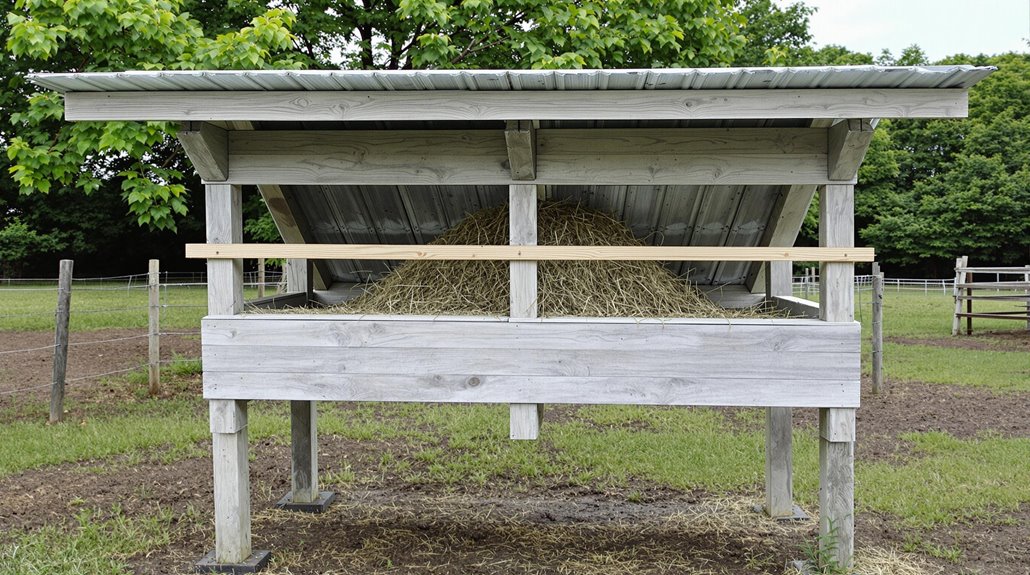
- Add a sloped roof using corrugated metal panels to keep your hay dry and protected from the elements.
Choosing the Perfect Location
Before installing your new hay feeder, you’ll need to carefully select an ideal location that protects your horses and maximizes the feeder’s functionality.
I recommend choosing level, well-draining terrain that won’t become muddy or slippery during wet weather. Your horses need firm footing to safely access their hay throughout the year.
Position the feeder where it receives partial sunlight exposure but also offers some shade during hot summer days.
I’ve found that placing the feeder about 50 feet from the barn, on slightly elevated ground, works best for most setups.
Make sure there’s enough space around the feeder for multiple horses to eat comfortably without feeling crowded, and keep it away from fences where they might get trapped or injured.
Mounting and Installation Tips
Once you’ve selected the perfect spot for your hay feeder, it’s important to approach the mounting process methodically and safely.
I’ve developed these mounting techniques and installation guidelines through years of experience, and I want to share them with you to guarantee your feeder stays secure.
- Start by marking your mounting points with a pencil, making sure they’re level and at the proper height for your horses (typically 48-52 inches from the ground).
- Pre-drill your holes using a drill bit slightly smaller than your mounting bolts, which helps prevent wood splitting and guarantees greater stability.
- Secure the feeder using galvanized lag bolts with washers, tightening them firmly but not so much that you damage the wood or strip the threads.
Remember to check your mounting hardware monthly for signs of wear or loosening.
Weather Protection Features

Since harsh weather can quickly damage an unprotected hay feeder, I’ve designed several essential features to keep your hay dry and your investment lasting longer.
I recommend installing a sloped metal roof that extends 6 inches beyond the feeder’s edges, creating effective rain protection for your hay and feeding area.
For maximum weather defense, I’ve incorporated removable wind barriers on three sides, using weather-treated plywood that you can easily adjust based on prevailing conditions.
The front remains open for easy access, but I’ve angled the top portion to deflect rain and snow.
You’ll want to position the feeder so the open front faces away from typical storm directions, which in most areas means keeping the opening oriented to the south or southeast.
Maintenance and Cleaning
Regular maintenance and cleaning are essential tasks that’ll keep your DIY hay feeder working smoothly for years to come. I recommend establishing a consistent cleaning frequency of at least once a week to prevent mold and bacteria growth that could harm your horses.
Here are my top maintenance tips to guarantee your feeder stays in prime condition:
- Sweep out loose hay and debris daily, paying special attention to corners where moisture can accumulate.
- Check all joints, screws, and fasteners monthly for signs of wear or loosening, and tighten or replace them as needed.
- Apply a food-safe waterproof sealant to wooden parts every six months to protect against rot and extend your feeder’s lifespan.
I’ve found that keeping basic cleaning supplies near your barn makes these tasks much more convenient.
Cost-Saving Strategies
A savvy horse owner’s wallet doesn’t have to take a heavy hit when building a DIY hay feeder, as I’ve discovered several money-saving tricks over the years. By exploring budget friendly options and resource recycling, I’ve found ways to create durable feeders at a fraction of retail costs.
| Material | New Cost | Recycled Cost |
|---|---|---|
| Lumber | $150-200 | $0-30 |
| Hardware | $45-60 | $15-25 |
| Roofing | $80-100 | $20-40 |
| Metal Grates | $90-120 | $25-45 |
| Labor | $200-300 | DIY Free |
I recommend checking local farm auctions, construction sites, and online marketplaces for discounted or free materials. You’ll often find perfectly good lumber from dismantled fencing, metal grates from old cattle panels, and roofing materials from renovated barns.
Common Design Variations

While many commercial hay feeders share similar features, I’ve worked with several distinct design variations that each offer unique benefits for different barn setups and feeding situations.
When exploring hay feeder styles and considering design customization, I recommend focusing on these proven configurations:
- Corner-mounted V-shaped feeders that attach securely to stall walls, perfect for individual horses who tend to be messy eaters.
- Freestanding covered feeders with slanted grids, which work well in paddocks and protect hay from weather while reducing waste.
- Wall-mounted horizontal designs with safety bars that prevent horses from pulling out too much hay at once and getting tangled.
I’ve found these variations consistently provide safe, efficient feeding solutions while allowing you to adapt the design to your specific needs.


